The Making of Wish Upon a Star
This is not really a tutorial how to draw or paint, it's just a little explanation how I created this artwork and some tips that maybe can be useful for others to know.
Keep in mind I'm no professional in this area, I'm mostly just playing around.
Click the images to see them larger.
TOOLS:
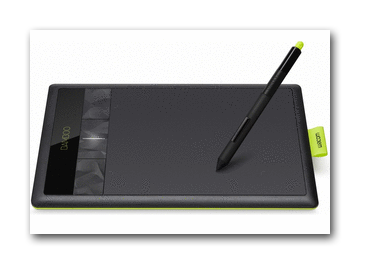
Easy Paint Tool Sai, Wacom Bamboo Manga
You can download Sai here, free trial for 30 days: Official Sai Site
IDEA:
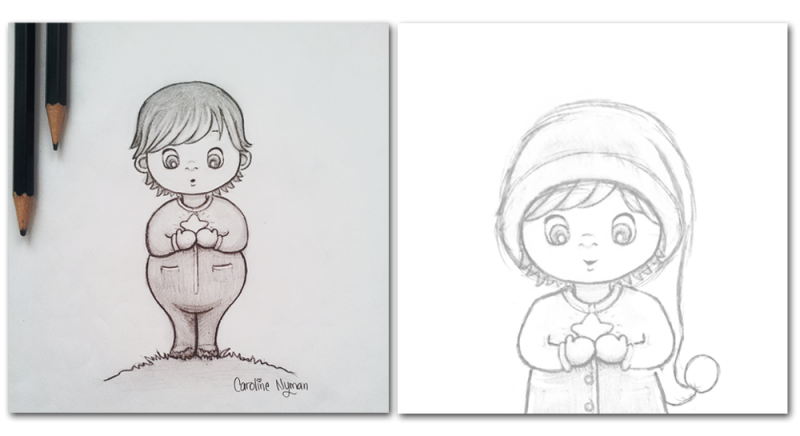
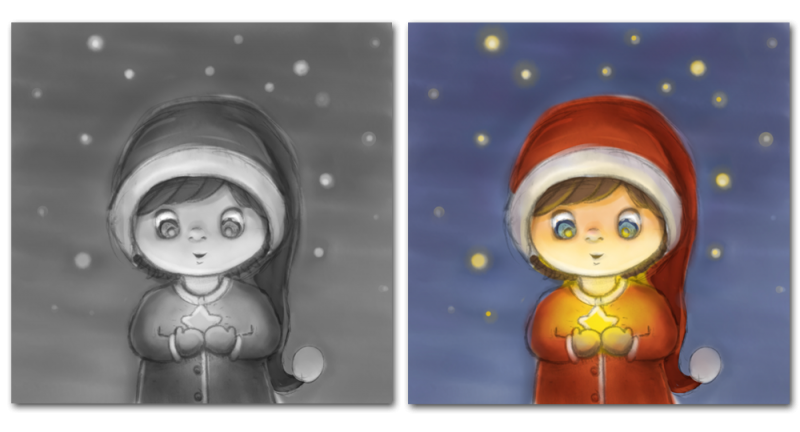
I had many ideas to draw but it was already December and all my ideas would take too long to finish so I decided to use a drawing I drew earlier that year.
Here you can see the transformation from the original drawing to the finished idea.
Since I was not going to have any visual line art in the painting it was enough with a sketch. I can focus on the details later when painting.
REFERENCES:
The only references I used for this painting was my old Santa works.
SIZE:
I normally work in A4, 300 dpi but lately I'm working in a square size for printing purposes so it fit on various products in different sizes. If I had a better computer I would work even larger.
After the painting is done I make a copy and crop it down to the size I want it to be displayed in. In this case a postcard.
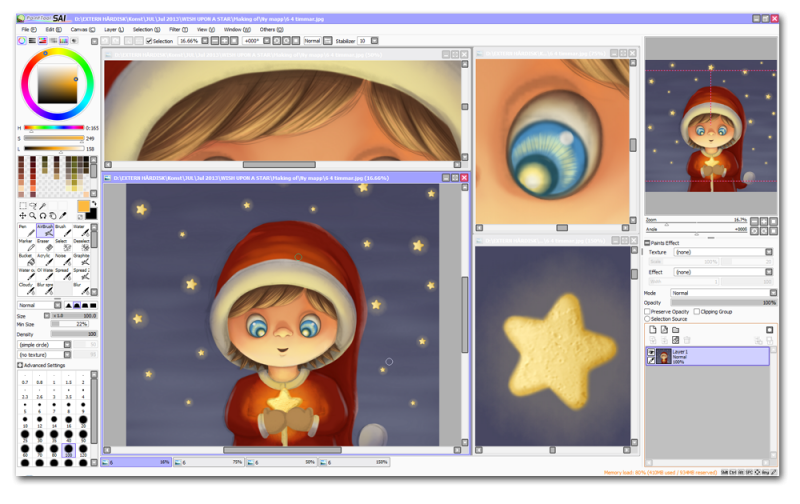
WORKING AREA:
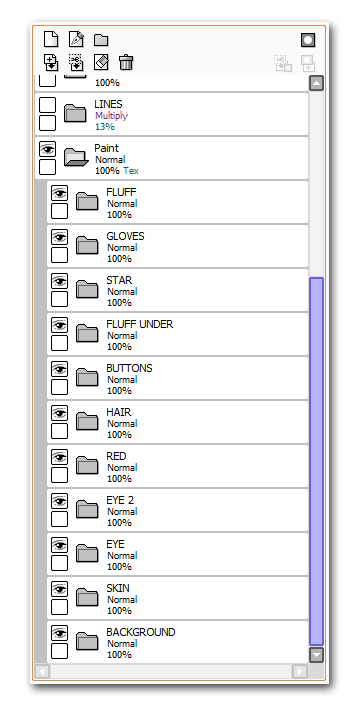
Here you can see what my Sai looks like.
You can open your canvas in different windows in sai. (View->new)
It's really nice if you wish to enlarge a part you are working on or see your references or what else you can think of. And it doest matter in what window you paint or save, they are all in sync.
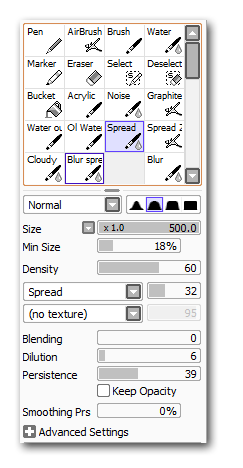
BRUSHES:
For this painting I used this "Spread" brush only and the blur tool with same texture.
Since I always blur things out it was not a big difference from the water tool I normally use.
THUMBNAILS:
Very important to start with before you go into painting so you have an idea what you want it to look like.
I made one thumbnail with values and one for colours.
They are suppose to be very small and you kind of paint them with you eyes squinted.
The thumbnails will be a nice guide for later when you want to choose a colour and where to paint the lights and shadows.
FOLDERS:
Before painting I create folders in the layer area. One for line art, references and one called Painting.
In the painting folder I create a new folder for every object. skin, hair, clothes, background etc.
I do this to keep things organized, easier to scroll through and if I wish to use textures on various parts (or the whole painting) I apply this to the folders instead of the actual paint.
I always change my mind and I don't want to repaint the whole thing if I happened to merge some layers without removing the texture before.
Example:
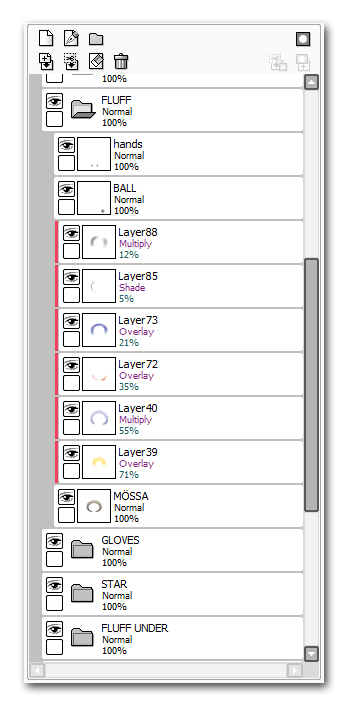
In the skin folder I create a new layer and name it Skin and there I paint the base colour. After that I make a new layer and link it to the skin layer so whatever I paint it will stay within the skin area.
If I have to many layers in one folder I sometimes merge them together so it is only three left. Skin, shadows and lights.
Less layers I have more happy my computer will be and faster it takes to save.
COLOURING:
I always start with the base colours on all objects and then I add shadows and lights.
Layers could look something like this: Skin base colour->shadows->more shadows->lights->extra light->reflection light->reflection colours->texture/details
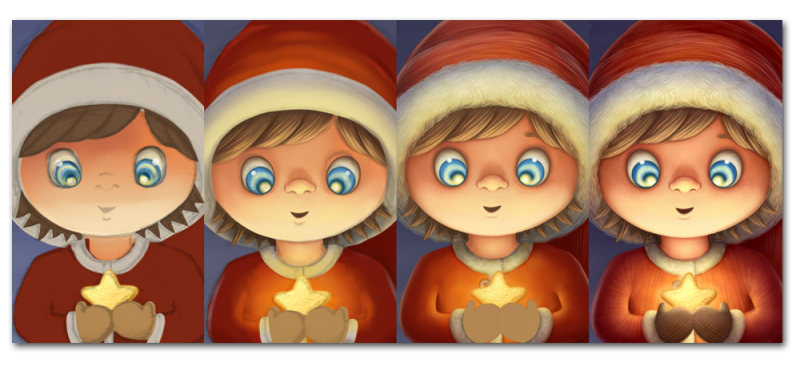
Here you can see some of the painting process. Not sure how to explain it so I let the pictures do it for me.
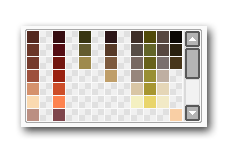
I also recently started to play around with the pallet thing in Sai, there you can plan what colours you are going to use and what order etc and they are always saved there even when you exit the program.
Can be handy when you want to stick to a specific colour pallet.
Values:
Now and then during painting I save the image as jpg, open it in Sai again, put it on top of all layers and make it grey scale. It is much easier to see the values when it is in black and white.
Above this I make a new layer, put it in Multiply and add shadows where it is missing.
When I'm done with that I either just redo the shadows in the right folders or copy the new shadow layer and add it on the object and link it to the base layer (clipping group)
I also do this with light but instead of multiply I use the mode overlay or luminosity.
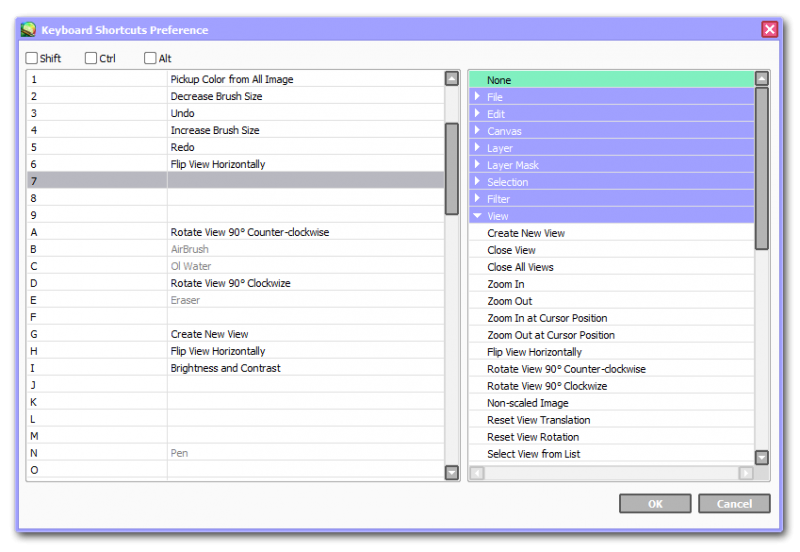
Key bindings:
I think most of us use a couple of key bindings like ctrl+Z etc.
I don't think I will ever learn to use the buttons on the actual tablet now when I'm so used to the keyboard, plus I play computer games and this is just more easy for me.
Here are some of my bindings on keyboard and pen (not num pad):
1= pick up colour from all image
2= decrease brush size
3= undo
4= increase brush size
5= redo
F2= flip view horizontally
W= zoom in at cursor position
S= zoom out at cursor position
A=rotate view counter-clockwise
D= rotate view of canvas clockwise
G= Open same canvas in new window
I= brightness and contrast
U= hue and Saturation
T= transform
Bottom pen button= Eraser (I don't use the eraser on other side of the pen cause it is not that precise as the nib)
Top pen button= Blur brush
Critique:
Before you take a break from painting, flip the canvas and shut the screen off.
Now when you come back you will see the painting in a whole new view. Open a new layer and start to critique yourself. Write down everything that you want to change, add or whatever you can think of and then start working on that.
If you have art friends, family etc. you can show them the painting and ask them to be honest and to give you constructive criticism. What do they think about it, what looks wrong or what they think would look good to add etc. Anything to help you make it more awesome.
Comments like ”That's look ok, that's nice, that's shit, you can do better, I don't know” is not helping anyone. It's just being lazy in my opinion.
If they do have good criticism, take it well, don't get offended. You want it, you need it to improve and get even better. Write it down, thank them and now go and think about what they said and how you can use it.
Remember, it doesn’t matter if it looks good or bad because it is yours and you can do whatever you want with it.
Time:
It doesn’t really matter how long it takes as long it is get done.
I tried to time this painting but problem is I always forget it to do it properly.
When I paint I take breaks, browse the net etc. and every time I forget to pause the clock when I do it and start it when I come back.
This one took around 20 hours, plus minus some hours.
I always think, ”yeah I will paint faster in the future”, but I don't.. cause I always find something that I can spend time on in a painting. I specially spend way too much time on the small details no one, except me, will ever see.
Some people can make wonderful paintings in some couple of hours and others it takes weeks for but it is the end result that is important. We all work differently.
Watermarks:
When I'm done with the painting I like to post it online for others to see.
I post it on several places like my website, Facebook, DeviantArt, Google+ and many other art related sites.
But before I do this I make a copy of the original drawing in .jpg and crop it down to a smaller size.
For example 800x600 and reduce the quality of the pixels.
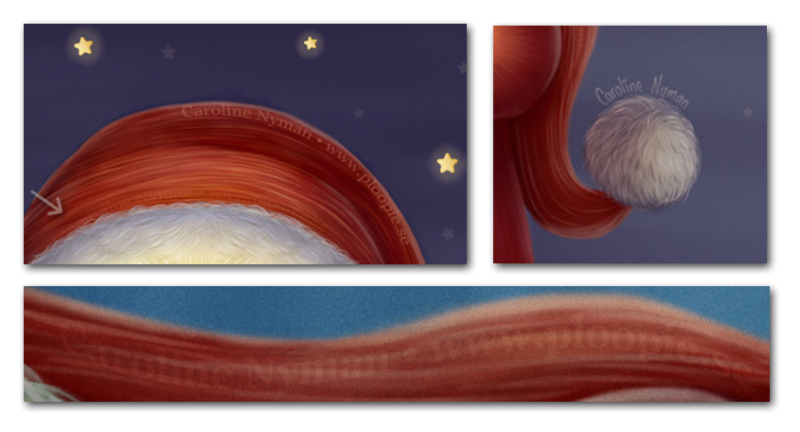
Then I create a watermark that contains my full name and website and place it on a position that can not be easily cropped out without cutting off a important piece of the painting.
It should be readable so if people spread it online they can always see who made it and where to find you. It should visible in a good discreet way and not interfere too much with the painting.
No one really likes to look at art with a huge watermark that covers the whole image.
But to be more sure no one will steal it, claim it as theirs and reproduce it, I add even more watermarks. But these are almost invisible and you only see them if you really look for them. You never know when you make a masterpiece!
Final words:
It is hard to explain what you do and how you do it when it comes to creating, we are not machines and painting itself is a story on it's own. I don't think we ever do the same thing twice.
When it comes to art we will never stop learning, it is our playground.
Most important is that we enjoy doing it and if other likes it as well, that's just a plus!
I hope this will help you in some way and that this will give you some insight of how I work.
Thank you for reading and I hope my English was not too terrible.
If you have any questions feel free to ask, all comments are welcome!
Now, have fun creating your own art!
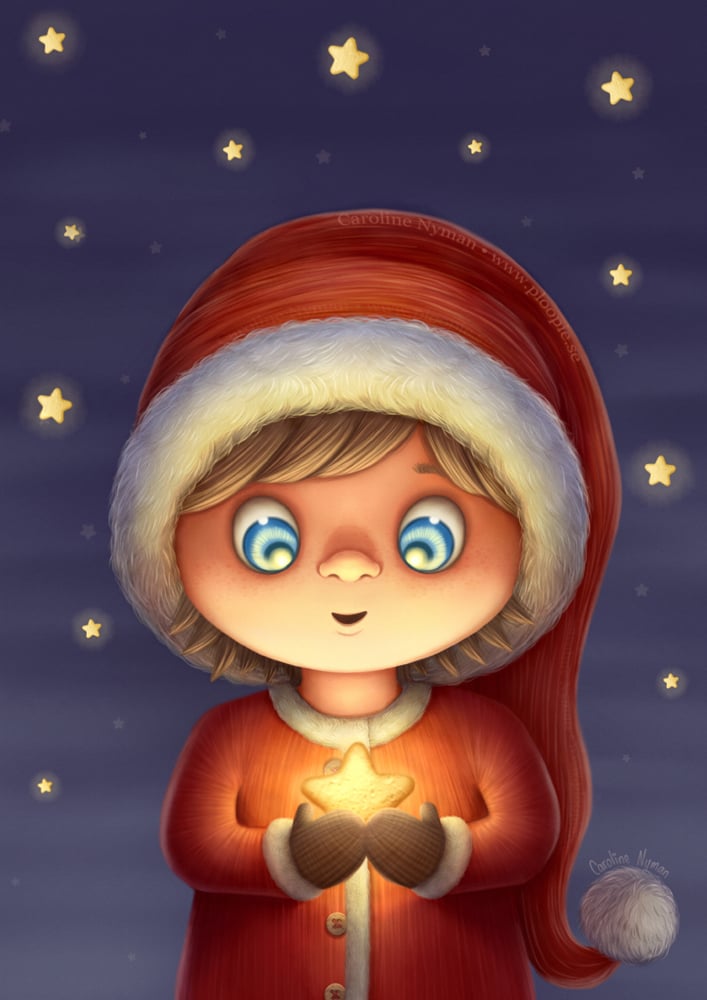
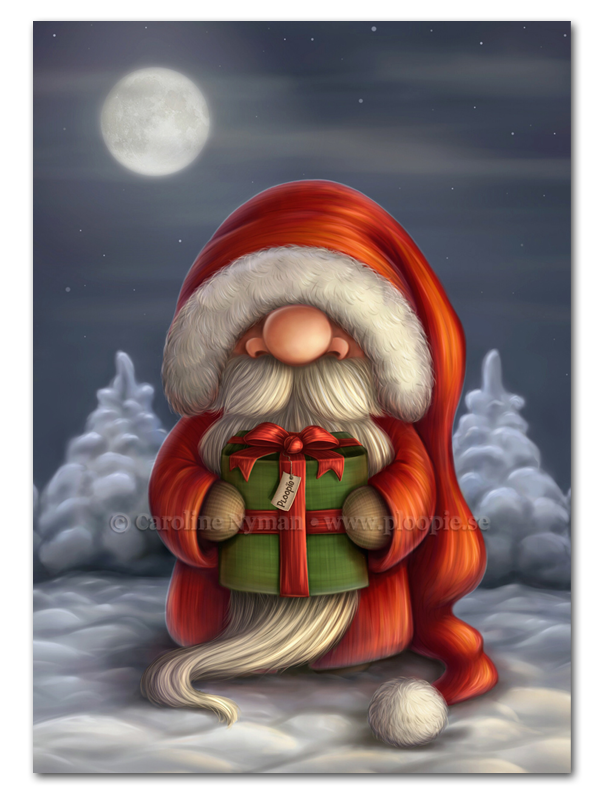
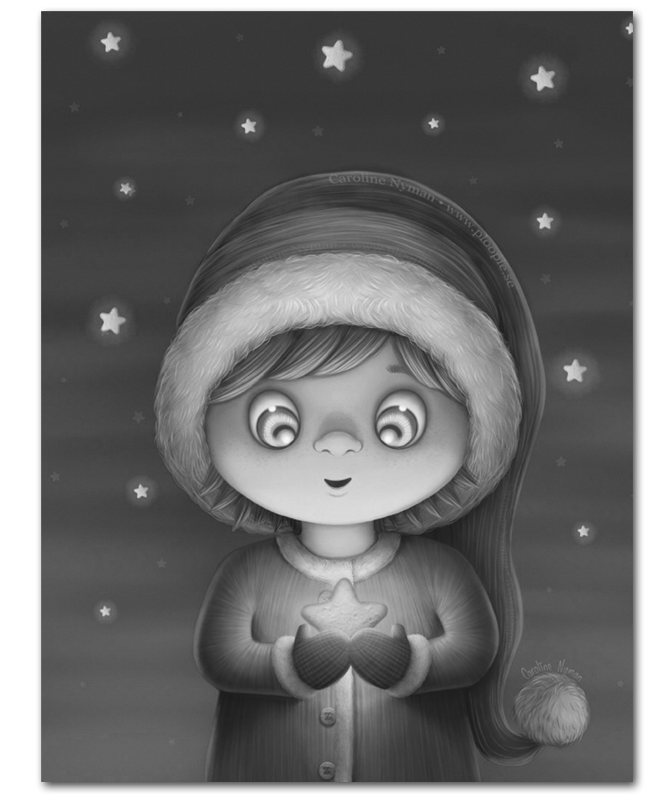
Here you can see the final painting and a process .gif where you can see the transformation from start to end.